Did you know that a simple efficiency check of your heating unit can greatly reduce energy bills? By regularly inspecting your system, you not only enhance comfort but also prevent costly repairs and potential safety hazards. Identifying signs of inefficiency early on can save you from unexpected breakdowns. You might wonder how to effectively monitor your heating system’s performance without professional help. Fortunately, there are straightforward DIY tests you can conduct. Curious about how to optimize your home’s warmth while ensuring your system’s longevity? Let’s explore these essential maintenance practices.
Importance of Regular Checks
Regular efficiency checks on your heating unit are essential to guarantee peak performance and prevent potential safety hazards. Whether your system is older or part of a recent furnace installation, scheduling consistent inspections ensures it operates efficiently, saving energy and reducing costs.
Begin by thoroughly visually inspecting the unit and its components. Look for signs of wear, corrosion, or damage, which could indicate underlying issues.
Confirm all electrical connections are secure and free from fraying or disconnection. Loose or damaged wires can lead to malfunctions or even fire hazards.
Examine the filters and clean or replace them as needed; clogged filters restrict airflow, forcing the system to work harder and less efficiently. Additionally, check the thermostat settings and operation. A malfunctioning thermostat can cause the unit to cycle unnecessarily, wasting energy and reducing comfort.
Inspect ductwork for leaks or obstructions that could impede airflow. Sealing leaks with appropriate materials will prevent energy loss and maintain consistent heating throughout your space.
Signs of Inefficiency
While regular checks are essential, recognizing the inefficiency in your heating unit can help you address issues before they escalate into costly repairs or safety hazards. Pay attention to specific indicators that your system isn’t performing at its best.
One critical sign is uneven heating in your home. If certain rooms are consistently colder, your system might struggle to distribute heat evenly.
Additionally, listen for unusual noises. Rattling, banging, or screeching indicate potential mechanical problems requiring immediate attention. Increased energy bills without a change in usage patterns can also signal inefficiency, as your system may be working harder to maintain desired temperatures.
Keep an eye out for:
- Frequent cycling: If your heating unit turns on and off more often than usual, it could indicate a failing thermostat or inadequate airflow.
- Yellow burner flame: A properly functioning gas furnace should have a steady blue flame. A yellow flame suggests combustion issues that might increase carbon monoxide risks.
- Cold air: If your vents blow cold air when they should be warm, it indicates a malfunction in the heating elements.
- Excessive dust: Increased dust around your home and heating unit might mean dirty filters or ductwork, restricting airflow.
Addressing these signs promptly aids in maintaining your heating unit’s efficiency and safety.
DIY Efficiency Tests
You can perform simple DIY efficiency tests to verify your heating unit operates safely and effectively. First, verify the unit is off before starting any checks.
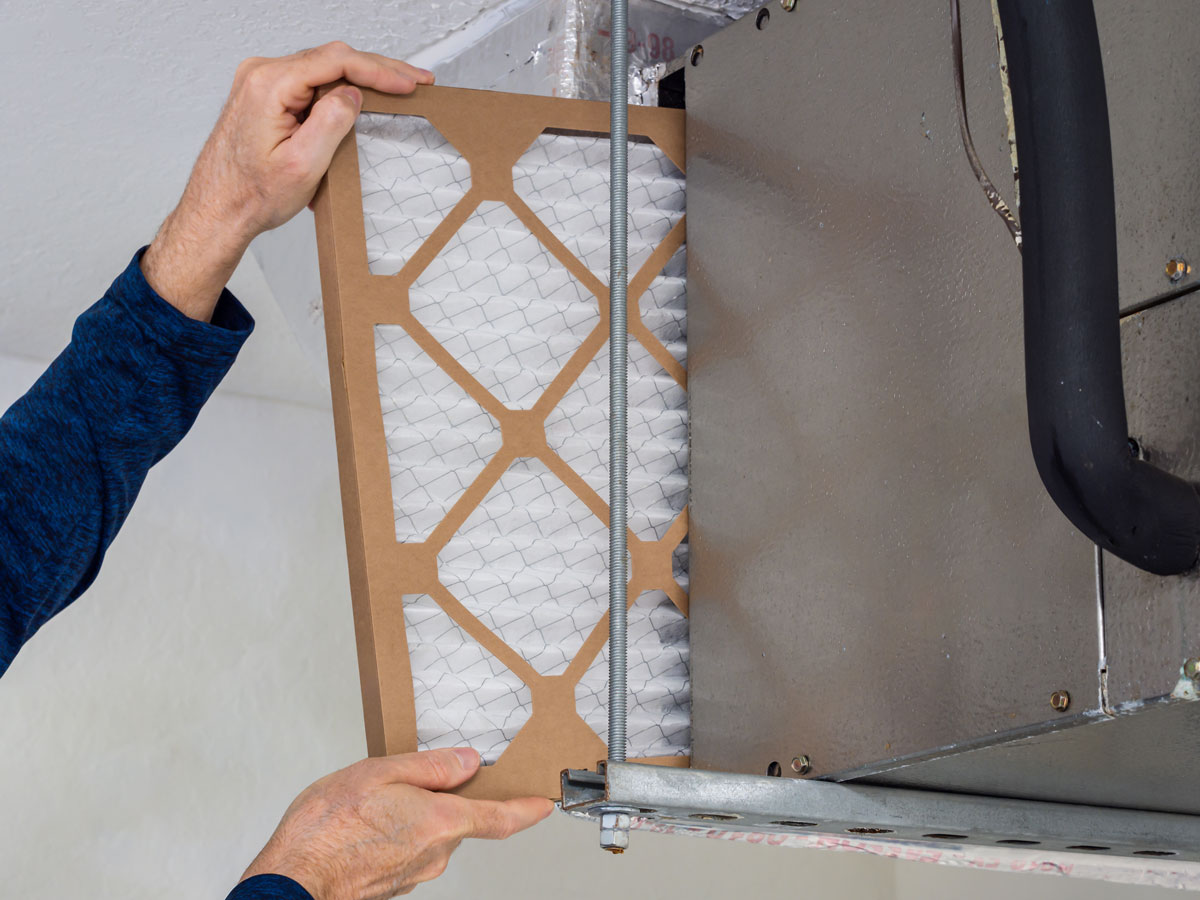
Begin by inspecting the air filter. A clogged filter restricts airflow, forcing the system to work harder. Remove the filter and hold it to the light; if you can’t see through it, it’s time for a replacement.
Next, assess the thermostat’s accuracy. Set it to a specific temperature and use an indoor thermometer to confirm the reading matches. If there’s a discrepancy, recalibrate the thermostat or replace its batteries.
Check the vents and registers for obstructions. Blocked vents can lead to uneven heating and increased energy use. Make sure furniture or curtains aren’t blocking airflow.
Inspect the exterior of your heating unit for any visible damage or debris. Clear away leaves, dust, or any other material that could impede performance.
Professional Inspections
Hiring a professional to inspect your heating unit guarantees it operates efficiently and safely. They can detect issues that mightn’t be apparent to the untrained eye. A licensed technician has specialized tools and knowledge to evaluate your system thoroughly. They verify that each component functions at its best, reducing the risk of breakdowns and enhancing the unit’s lifespan. By opting for professional inspections, you’re prioritizing safety and efficiency in your home.
During an inspection, a professional will:
- Examine electrical connections: Loose or corroded wires can pose a fire hazard, and a technician will confirm all connections are secure.
- Check for gas leaks: Detecting even minor leaks is vital, as they can lead to dangerous carbon monoxide exposure.
- Analyze the heat exchanger: Cracks or faults in this component can allow harmful gases to enter your living space.
- Assess airflow and ventilation: Confirming unobstructed airflow prevents overheating and maintains peak performance.
You should have a professional inspection at least once a year, ideally before the heating season begins. This proactive measure helps you avoid unexpected malfunctions and verifies that your system operates efficiently, keeping your home comfortable and safe.
Thermostat Calibration
Verifying your thermostat is accurately calibrated is an essential step in maintaining the efficiency and safety of your heating system. An improperly calibrated thermostat can cause your system to run too hot or too cold, leading to energy waste and potential safety hazards.
Start by verifying the thermometer reading on your thermostat against a reliable room thermometer. Place the room thermometer near the thermostat, away from drafts or direct sunlight, for an accurate comparison.
If there’s a discrepancy between the two readings, recalibrate your thermostat. Most modern digital thermostats include a calibration setting accessible through the menu. For older analog models, you’ll need to adjust the calibration screw located inside the unit. Always refer to the manufacturer’s instructions specific to your model to avoid missteps.
Consider the impact of thermostat placement on calibration. The unit should be on an interior wall, away from direct sunlight and drafts, and not near heat-generating appliances. This guarantees accurate readings reflecting the room’s actual temperature.
Regularly checking and calibrating your thermostat improves heating efficiency, enhances comfort, and guarantees your system operates safely. By taking these steps, you prevent unnecessary wear on your heating unit and optimize energy consumption.
Air Filter Maintenance
Regularly replacing or cleaning your heating unit’s air filter is essential for maintaining peak airflow, enhancing system efficiency, and guaranteeing safe operation. A clogged filter can restrict airflow, forcing the system to work harder, and leading to increased energy consumption and potential overheating.
To make sure your heating unit operates at its best, consider these key steps:
- Choose the Right Filter Type: Select a filter with your system’s correct MERV (Minimum Efficiency Reporting Value) rating. A higher MERV rating means better filtration but could restrict airflow if incompatible with your unit.
- Follow the Replacement Schedule: Filters should be checked monthly and replaced every 1-3 months. However, this can vary based on usage and environmental factors such as dust and pet dander.
- Inspect for Damage: Regularly check filters for tears or damage that could compromise effectiveness. Damaged filters need immediate replacement to maintain system integrity.
- Maintain a Clean Environment: Reduce dust accumulation by keeping surrounding areas clean and removing obstructions near air vents to minimize strain on the filter and enhance air quality.
Ductwork Evaluation
How often do you thoroughly inspect your ductwork to confirm it’s free of leaks and obstructions that could compromise your heating unit’s efficiency and safety?
Regularly evaluating your ductwork is essential, as leaks can lead to significant energy loss and increased utility bills. Start by visually inspecting the ducts for visible gaps, disconnected sections, or any signs of wear and tear. Pay special attention to connections at vents and registers, as these are common areas for leaks.
Use a smoke pencil or incense stick to detect airflow irregularities. Hold it near duct joints; you may leak if the smoke wavers or gets pulled into the duct. Don’t forget to check for obstructions, such as dust, debris, or pests, which can block airflow and strain your heating unit.
Confirm that all access panels are securely fastened and that duct insulation is intact where applicable. If you identify any issues, promptly seal leaks with mastic sealant or metal tape, not duct tape, which can degrade over time.
Insulation Improvements
Upgrading your home’s insulation is crucial for maximizing your heating unit’s efficiency and maintaining a comfortable indoor environment. Proper insulation reduces heat loss, guaranteeing your heating system doesn’t work harder than necessary.
Evaluate your current insulation levels in critical areas like the attic, walls, and crawl spaces. For peak performance, insulation’s R-value, which measures resistance to heat flow, should meet or exceed local building codes.
Here’s how you can enhance insulation effectively:
- Inspect and Seal Gaps: Look for gaps or cracks in walls, windows, and doors. Seal them with weatherstripping or caulk to prevent air leaks.
- Add Attic Insulation: Check if you have adequate attic insulation. To boost the R-value, you can add fiberglass batts or loose-fill cellulose.
- Upgrade to Spray Foam: Consider spray foam insulation for its superior air-sealing properties and high R-value per inch.
- Replace Old Insulation: If your insulation is outdated or damaged, replace it with modern materials like foam board or rigid panels.
Safety is paramount, so wear protective gear when handling insulation materials. Always follow manufacturer recommendations and local regulations to guarantee a safe and efficient insulation upgrade, which will reduce energy costs and improve comfort.
Energy Efficiency Upgrades
To optimize your heating unit’s performance and reduce energy consumption, thoroughly audit your home’s current energy usage and identify potential areas for efficiency enhancements. Look for drafts around windows and doors, and guarantee proper insulation in walls and attics.
Consider upgrading to a programmable thermostat, which allows you to set specific temperatures for different times of the day, guaranteeing heating only when necessary.
Next, evaluate your heating unit’s efficiency rating. Older units may not meet current energy efficiency standards, so upgrading to a modern high-efficiency model can result in significant savings. Look for units with an ENERGY STAR label, which guarantees the unit meets strict energy efficiency guidelines. Pay attention to the Annual Fuel Utilization Efficiency (AFUE) rating; higher percentages indicate more efficient units.
Consider installing zone heating systems, which allow you to control heat distribution in different areas of your home, minimizing energy waste. Additionally, upgrading ductwork to reduce leaks and improve airflow can boost system efficiency.
Always adhere to safety guidelines when making upgrades, and consult professionals to guarantee compliance with local codes and standards, optimizing comfort and safety.
Scheduling Routine Maintenance
Assuring your heating unit operates at peak efficiency requires scheduling routine maintenance to address any potential issues before they escalate into costly repairs.
Regular inspections not only extend the lifespan of your system but also guarantee safety and reliability. To keep your unit in prime condition, plan maintenance checks at least once a year, ideally before the heating season begins.
During these maintenance sessions, technicians will:
- Inspect and clean components: Dust and debris can accumulate in burners and heat exchangers, reducing efficiency. Cleaning guarantees unobstructed airflow and proper combustion.
- Check electrical connections: Loose or corroded wires can pose safety hazards and cause operational failures. Tightening connections prevents malfunctions.
- Test safety controls: Safety mechanisms such as the limit switch and pressure relief valve need verification to function correctly and prevent overheating and pressure build-up.
- Calibrate thermostat settings: Accurate readings ensure your system cycles appropriately, maintaining comfort and reducing energy consumption.
Conclusion
Imagine your heating system as the heartbeat of your home, tirelessly working to keep you warm and cozy.
By embracing regular efficiency checks, you’re not just maintaining comfort but safeguarding your sanctuary.
Look for signs of inefficiency, perform simple DIY tests, and let professionals handle the intricate details.
Fine-tune your thermostat, seal those ducts tight, and consider energy upgrades.
With each step, you’re weaving a warm, safe cocoon for your family.